Actually compiling (building) a game with Unity can be slow. It hogs all the resources on your computer, leaving a frustrated Unity developer unable to do much else. Multiply this problem by building for many platforms (iPhone, Android, etc.) and the wasted time becomes rather painful. Thankfully, it’s possible to create a Unity Cloud build free.
The Unity Cloud Build feature solves this by allowing developers to trigger builds in the cloud. Unfortunately, Cloud Build requires a subscription to Unity Teams or Unity Pro, which can become very expensive very fast for an indie developer. Plus, it doesn’t quite fit with the workflow I’m accustomed to after years working in tech companies.
Check out the unity3d-buildkite open-source project on Github.
Goals of Unity Continuous Integration
My goal with this open-source project were as follows:
- 100% Free Continuous Integration.
- Run on personal hardware (computer at home) or in the cloud.
- Support versioning (pre-releases, release candidates).
- Highly customizable, applicable to any project.
- Dead-simple to deploy, with no changes required to the Unity project.
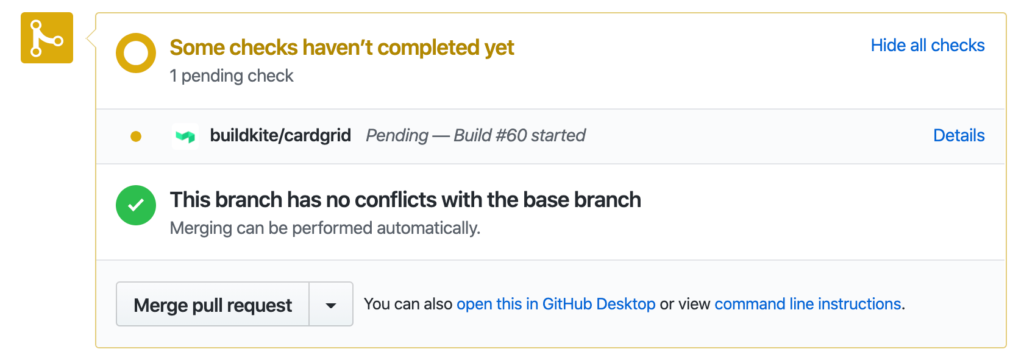
I came upon Gableroux’s GitLab Unity Cloud Build free CI tool, which installs Unity Linux into a docker container. This handled most of the hard work, but it still wasn’t quite easy enough to deploy to Github. I wanted to make it so that every pull request could automatically trigger tests and builds, integrating directly with the Github merge button:

Unity Cloud Build Free with BuildKite
I was looking for a more typical Continuous Integration (CI) system, and was familiar with Buildkite from my time working at Airbnb. Buildkite has a free tier that works well enough for indie developers (and is reasonably priced beyond that). Plus, it’s easy to set up and provides the Github integration shown above.
So I built upon the Unity Cloud Build free tool by layering in Buildkite and a few other tools to a new docker container. The inzania/unity3d-buildkite docker image is now available on Docker Hub, and instructions for use are available in the Github README.
The readme includes a sample Buildkite pipeline and instructions for deployment. It also includes a Helm chart to make deployment on Kubernetes dead-simple.
The result? Clicking the “show checks” button in Github opens the Buildkite, where each platform can be downloaded as an artifact:

How it Works
When the build agent picks up a new build, it runs a command such as the following (see the sample pipeline in the readme for details):
/bin/ci/make.py unity build my-project iOS "Assets/Scenes/Client.unity"This starts by copying some build scripts into Assets/Editor/UnityCI. These scripts are invoked by the -executeMethod flag, which tells Unity to simply call a static editor function.
If you don’t want scripts copied in to your project, you can change this any many other parts of the behavior with flags to the build script, as described in the readme.
The UnityCI build script also writes a Assets/Resources/Version.txt and Assets/Resources/Commit.txt into the project at build-time. This allows the game to be version-aware (i.e., show the user the current version). The former is a semantic version number (a.k.a., major.minor.patch-prerelease+buildnumber). You can change the version itself by using git tag -a v0.0.2, whereas the prerelease is determined by the branch name and buildnumber comes from Buildkite. The commit is simply the SHA of the git commit.
Bonus: Unity Linux Server Docker Images
My games frequently involve a server-side component. To achieve this, one of my BuildTargets is StandaloneLinux64. To actually deploy this to a server, I wrap it in a Docker container. This can be done with the same CI tool using the following command:
/bin/ci/make.py docker build my-project StandaloneLinux64 inzania/my-projectThis takes the output from the prior step, writes a Dockerfile, and builds it all together before pushing to the specified repository. The resulting Docker image is also tagged with the semver, such as inzania/my-project:v0.0.1.
I’ve tested all this with three separate projects now and it’s been working well as a . If you try it, let me know how it goes!


Thanks for such brilliant tools.
But I am still not able to understand how you integrated git with pipeline.
Can you please provide step by step instructions for same. Thanks
Buildkite’s official instructions explain how to integrate with Git.