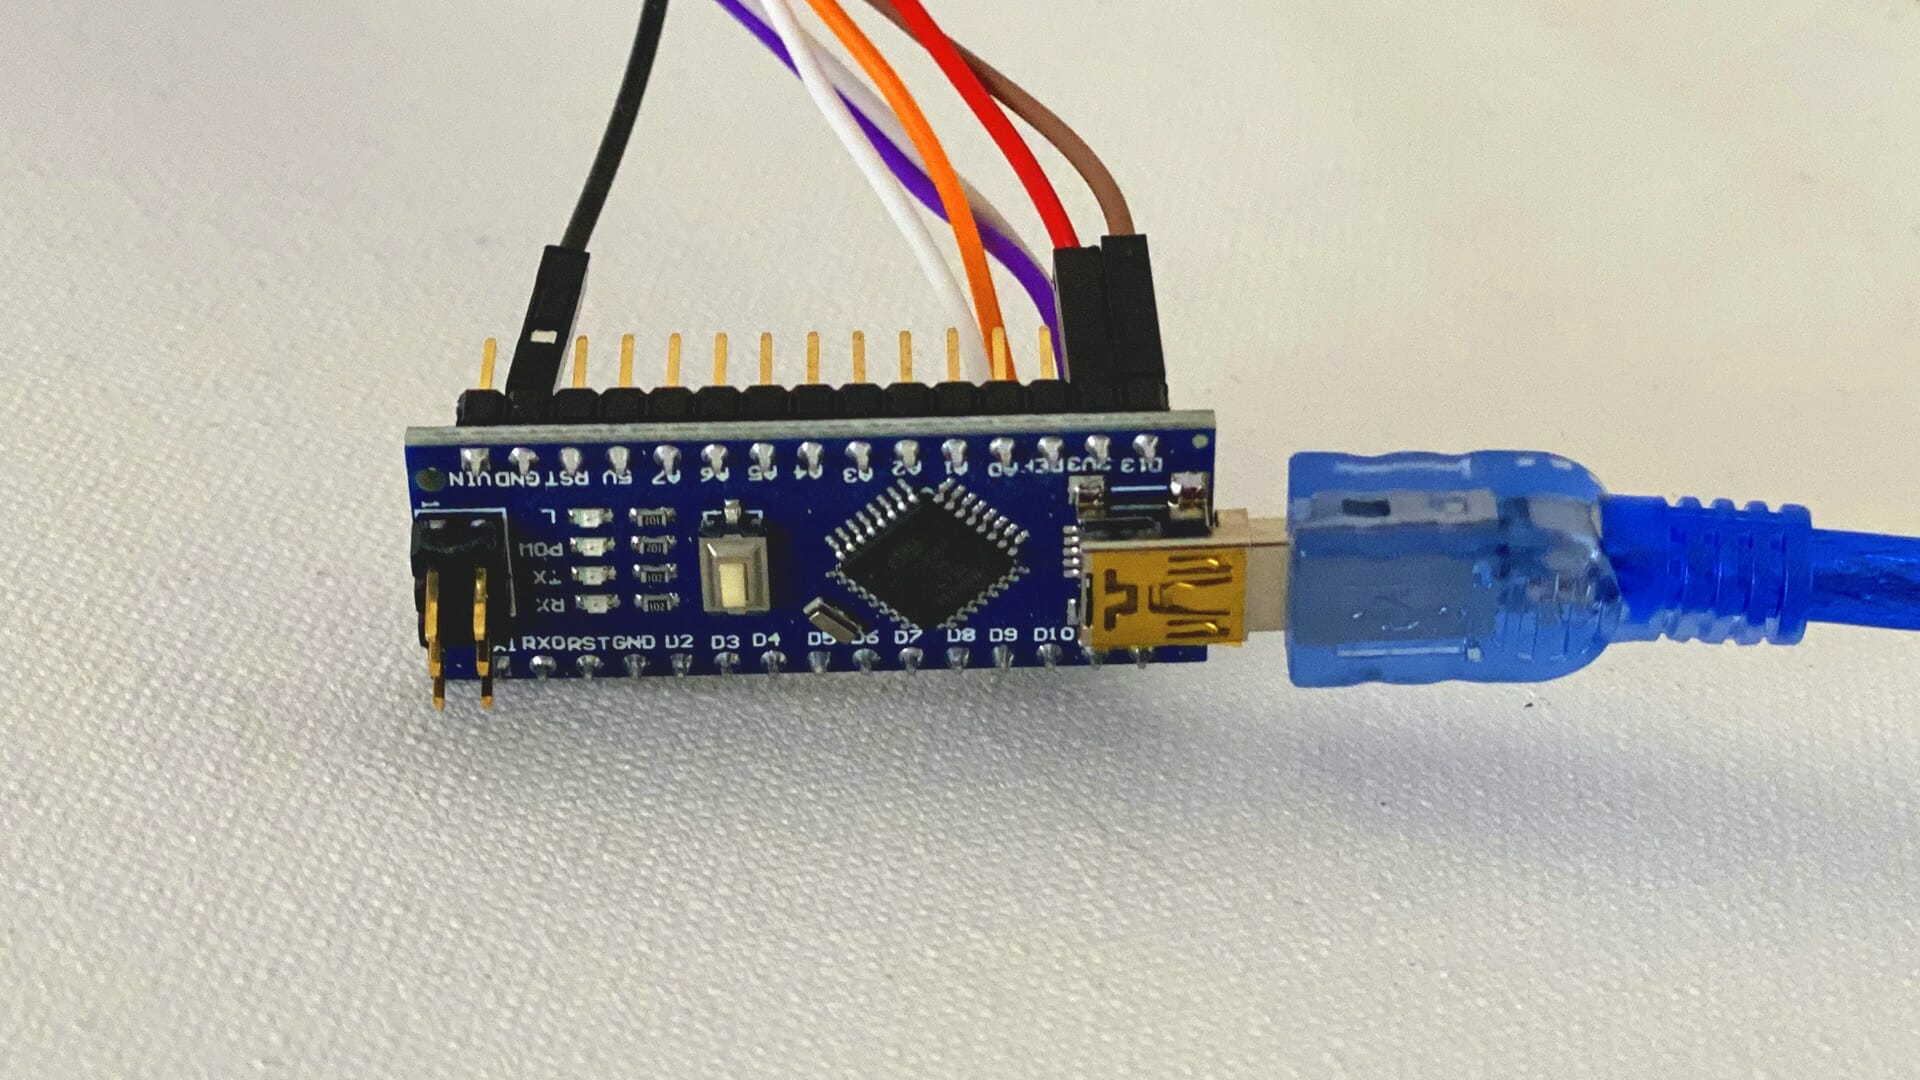
Many people come to the DIY IOT space by way of Arduino Uno & Nano. One simple approach to home automation is to treat the Arduino as a USB device which provides the Raspberry Pi sensors’ readings.
This was the first sensor built for my retrofit of a snowy cabin into a smart home.
It was the first step toward building a “Nest-equivalent” smart (programmable) tri-zone thermostat with Grafana integration.
The first step in building a learning thermostat from scratch is to have good temperature readings in each of the zones. But why stop there? The cabin is outside Denver, where it is extremely dry — humidity readings set the stage to later automate the humidifiers, too. And since the cabin is heated with propane, a smoke+CO2 sensor helps with a sense of security.
You can skip this first section or two if you already know your way around Arduino; the second half of the post looks at the process of integrating Raspberry Pi sensors into a network.
Why DIY with Arduino?
I know I was daunted by Arduino before I actually started playing with one.
“Playing,” though, is the right word. There’s a reason there are so many maker-kits aimed at kids. The electronics have gotten cheap enough, and the tools good enough that anybody can put some pieces together and make… something.
Entertainment value aside, building DIY sensors for a smart home offers increased security and privacy. Plus, it’s cheaper than buying brand-name sensor packages. Finally, you can package the finished product in any creative way you like, making it more aesthetically pleasing (see what I mean).
I first got my hands on a 3-pack of Arduino nanos ($14) and an IOT sensor starter kit ($75). This is a great place to start if you’ve not built anything with Arduino before. The Adeept kit comes with excellent pinout diagrams and source code in a PDF. This saves a lot of time otherwise spent digging around the internet looking for the right libraries. The buttons, sliders, and various tactile input devices feel surprisingly nice for a relatively cheap kit. A breadboard, wires, and resistors seemed a bit excessive at first, but I have ended up using just about every part in this kit.
That said, this example only uses the DHT11 sensor, which can read temperature and humidity, plus the MQ-2 which reads propane and CO. It’s worth mentioning that the DHT11 sensor is not terribly accurate. The error bars on the readings can be about ~2 degrees C, and ~5% humidity. The DHT22 spec is much better, with a wider range of readings and higher accuracy. The best supplier I’ve found, balancing quality and price, runs $13 for a 2-pack.
Raspberry Pi Sensors
The Raspberry Pi reads temperature from the Arduino Nano in a USB port.
This is part of a greater Kubernetes-based IOT network architecture. But that’s not terribly important for the context of this post. The important thing is that the Arduino spits out JSON-formatted data over its USB port. The Raspberry Pi listens using Node Red. There are other formatting options, like the discussion about MySensors, but for these purposes JSON makes a lot of sense.
JSON is universal, and carries no dependencies.
It’s also easy to test Raspberry Pi sensors over USB with the Arduino IDE. When the device is connected via USB to the computer, like with normal development, the Serial Monitor feature used for debugging is showing exactly what the Raspberry Pi will eventually see.
It was also intentional that the thermostat to have no concept of an internet connection.
A thermostat in cold climates is a “mission-critical” part of the home infrastructure. If it fails, pipes freeze and burst.
The thermostat needs to be able to function when the only thing it has is power. It also needs to be able to recover from power loss (though, the finished product also includes a 24h battery backup). It’s a basic truism of engineering that the fewer variables involved in this, the more reliable it will be. And the internet is just one more thing that can fail.
Enough theory. Let’s look at the actual Arduino design.
Schematic (Pin Diagram)
There are only three parts involved: the Arduino Nano, the DHT sensor, and the MQ-2 sensor. If you used the kit mentioned above, you’ll already have the necessary wires to connect the sensors together.
Get all the Arduino files, including source code, over at Fritzing (or below).
Note that the two sensors need to share the 3v power pin. Always check the specs on sensors to see if they require 3v or 5v power (or will accept both). If two devices need to share power, like in this case, most people start by prototyping using a breadboard. Later, you can either solder the connections, or splice wires together.
Arduino Uno/Nano Source Code
Before you run this, you’ll need to add the following libraries to your Arduino IDE:
The first two make it easy to read the DHT & MQ sensors (they also support the other variants thereof). The last, EasingLib, provides smoothing functions that help generate better sensor data.
The #define statements in the first section are the only things that should require modification. To use this code with other sensors, have a look at the Sensor class and the following declarations.
/****************************************************************
  GLOBAL CONFIGURATION
****************************************************************/

#define SENSOR_UPDATE_MS 10000 // Milliseconds between publishing to the serial port.

#define PIN_DHT11     2  // Digital pin 2
#define PIN_MQ2       A1 // Analog pin 1

#define IMPERIAL true // False for Metric.

/****************************************************************
  Sensors
****************************************************************/
#include "DHT.h"
#include <MQUnifiedsensor.h>
#include "EasingLib.h" // Smoothing algorithms.

class Sensor {
private:
  Easing _easing;
  float _value;

public:
  char name[16];
  char prefix[10];
  char unit[3];

  // Returns true if value changed.
  bool setValue(float value) {
    if (_easing) {
      _easing.SetSetpoint(value);
      float ev = _easing.GetValue();
      if (abs(ev - _value) < 0.1) return false;
      value = ev;
    }
    _value = value;
    return true;
  }

  float getValue() {
    return _easing ? _easing.GetValue() : _value;
  }

  void printJson() {
    Serial.print('"');
    Serial.print(name);
    Serial.print(F("\": "));
    Serial.print(getValue());
  }

  Sensor(const char* sensor_name, const char* sensor_unit, bool instant = false) {
    if (!instant) _easing = Easing();
    _value = 0.0;
    strcpy(name, sensor_name);
    strcpy(unit, sensor_unit);
  }
};

#define NUM_SENSORS  4 // See the "senors[NUM_SENSORS]" array below for config.

Sensor sensors[NUM_SENSORS] = {
#if IMPERIAL
  Sensor("Temperature", "F"),
#else
  Sensor("Temperature", "C"),
#endif
  Sensor("Humidity", "%"),
  Sensor("Propane", "ppm"),
  Sensor("CO", "ppm"),
};

/****************************************************************
  Main
****************************************************************/

DHT dht(PIN_DHT11, DHT11);
MQUnifiedsensor mq2(PIN_MQ2, 2);

// Returns true if any value changed.
bool updateSensors() {
  mq2.update();
  bool valueChanged = false;
  valueChanged = sensors[0].setValue(dht.readTemperature(IMPERIAL)) || valueChanged;
  valueChanged = sensors[1].setValue(dht.readHumidity()) || valueChanged;
  for (int x=2; x<NUM_SENSORS; x++) {
    valueChanged = sensors.setValue(mq2.readSensor(sensors.name)) || valueChanged;
  }
  return valueChanged;
}

bool areSensorsLoaded() {
  return abs(sensors[0].getValue()) > 1;
}

void setup() {
  Serial.begin(9600);
  Serial.setTimeout(1000);

  pinMode(PIN_DHT11, INPUT);
  pinMode(PIN_MQ2, INPUT);
  dht.begin();
  mq2.inicializar();

  updateSensors();
}

void printSensors() {
  Serial.print('{');
  for (int x=0; x<NUM_SENSORS; x++) {
    if (x != 0) Serial.print(F(", "));
    sensors.printJson();
  }
  Serial.println('}');
}

void loop() {
  static unsigned long lastSensorUpdate;
  unsigned long now = millis();
  unsigned long elapsed = now - lastSensorUpdate;
  bool updatingSensors = elapsed >= SENSOR_UPDATE_MS;

  if (!updatingSensors) return;
  updateSensors();
  // Give everything some time to start up and collect initial readings.
  if (areSensorsLoaded()) {
    printSensors();
  }
  lastSensorUpdate = now;
}
Node RED Source Code
Assuming Node RED is already installed in the cluster, install these packages:
The following Flow receives the Raspberry Pi sensors’ data via a Serial Port and pipes it to Home Assistant.

[
    {
        "id": "bd649d08.568b6",
        "type": "tab",
        "label": "Sensors",
        "disabled": false,
        "info": ""
    },
    {
        "id": "bbec810c.a3bfb",
        "type": "serial in",
        "z": "bd649d08.568b6",
        "name": "arduino-nano",
        "serial": "90c2a508.6d0168",
        "x": 110,
        "y": 60,
        "wires": [
            [
                "f794a46b.486858"
            ]
        ]
    },
    {
        "id": "79e7baff.656364",
        "type": "debug",
        "z": "bd649d08.568b6",
        "name": "",
        "active": true,
        "tosidebar": true,
        "console": false,
        "tostatus": false,
        "complete": "false",
        "x": 510,
        "y": 420,
        "wires": []
    },
    {
        "id": "f794a46b.486858",
        "type": "json",
        "z": "bd649d08.568b6",
        "name": "",
        "property": "payload",
        "action": "",
        "pretty": false,
        "x": 250,
        "y": 60,
        "wires": [
            [
                "bc38f264.db1ef",
                "e9f2e556.65f328"
            ]
        ]
    },
    {
        "id": "bc38f264.db1ef",
        "type": "function",
        "z": "bd649d08.568b6",
        "name": "round",
        "func": "msg.payload.temp = Math.round(msg.payload.Temperature * 10) / 10\nreturn msg;",
        "outputs": 1,
        "noerr": 0,
        "x": 370,
        "y": 60,
        "wires": [
            [
                "feedc56a.847f68"
            ]
        ]
    },
    {
        "id": "feedc56a.847f68",
        "type": "ha-entity",
        "z": "bd649d08.568b6",
        "name": "Hearth Temperature",
        "server": "d9aa779f.afb208",
        "version": 1,
        "debugenabled": false,
        "outputs": 1,
        "entityType": "sensor",
        "config": [
            {
                "property": "name",
                "value": ""
            },
            {
                "property": "device_class",
                "value": "temperature"
            },
            {
                "property": "icon",
                "value": ""
            },
            {
                "property": "unit_of_measurement",
                "value": "°F"
            }
        ],
        "state": "payload.temp",
        "stateType": "msg",
        "attributes": [
            {
                "property": "temperature",
                "value": "payload.Temperature",
                "valueType": "msg"
            },
            {
                "property": "humidity",
                "value": "payload.Humidity",
                "valueType": "msg"
            },
            {
                "property": "co",
                "value": "payload.CO",
                "valueType": "msg"
            },
            {
                "property": "smoke",
                "value": "payload.Propane",
                "valueType": "msg"
            }
        ],
        "resend": true,
        "outputLocation": "",
        "outputLocationType": "none",
        "inputOverride": "allow",
        "x": 570,
        "y": 60,
        "wires": [
            []
        ]
    },
    {
        "id": "e9f2e556.65f328",
        "type": "split",
        "z": "bd649d08.568b6",
        "name": "",
        "splt": "\\n",
        "spltType": "str",
        "arraySplt": 1,
        "arraySpltType": "len",
        "stream": false,
        "addname": "name",
        "x": 150,
        "y": 180,
        "wires": [
            [
                "791f160e.a229a8"
            ]
        ]
    },
    {
        "id": "791f160e.a229a8",
        "type": "switch",
        "z": "bd649d08.568b6",
        "name": "",
        "property": "name",
        "propertyType": "msg",
        "rules": [
            {
                "t": "eq",
                "v": "Humidity",
                "vt": "str"
            },
            {
                "t": "eq",
                "v": "Propane",
                "vt": "str"
            },
            {
                "t": "eq",
                "v": "CO",
                "vt": "str"
            }
        ],
        "checkall": "true",
        "repair": false,
        "outputs": 3,
        "x": 270,
        "y": 180,
        "wires": [
            [
                "29441aef.e31e26"
            ],
            [
                "e61fc36c.a3af9"
            ],
            [
                "4c1f9507.3c368c"
            ]
        ]
    },
    {
        "id": "29441aef.e31e26",
        "type": "ha-entity",
        "z": "bd649d08.568b6",
        "name": "Hearth Humidity",
        "server": "d9aa779f.afb208",
        "version": 1,
        "debugenabled": false,
        "outputs": 1,
        "entityType": "sensor",
        "config": [
            {
                "property": "name",
                "value": "Hearth Humidity"
            },
            {
                "property": "device_class",
                "value": "humidity"
            },
            {
                "property": "icon",
                "value": ""
            },
            {
                "property": "unit_of_measurement",
                "value": "%"
            }
        ],
        "state": "payload",
        "stateType": "msg",
        "attributes": [],
        "resend": true,
        "outputLocation": "",
        "outputLocationType": "none",
        "inputOverride": "allow",
        "x": 540,
        "y": 120,
        "wires": [
            []
        ]
    },
    {
        "id": "e61fc36c.a3af9",
        "type": "ha-entity",
        "z": "bd649d08.568b6",
        "name": "Hearth Propane",
        "server": "d9aa779f.afb208",
        "version": 1,
        "debugenabled": false,
        "outputs": 1,
        "entityType": "binary_sensor",
        "config": [
            {
                "property": "name",
                "value": "Hearth Propane"
            },
            {
                "property": "device_class",
                "value": "safety"
            },
            {
                "property": "icon",
                "value": ""
            },
            {
                "property": "unit_of_measurement",
                "value": ""
            }
        ],
        "state": "payload > 500",
        "stateType": "jsonata",
        "attributes": [],
        "resend": true,
        "outputLocation": "",
        "outputLocationType": "none",
        "inputOverride": "allow",
        "x": 540,
        "y": 160,
        "wires": [
            []
        ]
    },
    {
        "id": "4c1f9507.3c368c",
        "type": "ha-entity",
        "z": "bd649d08.568b6",
        "name": "Hearth CO",
        "server": "d9aa779f.afb208",
        "version": 1,
        "debugenabled": false,
        "outputs": 1,
        "entityType": "binary_sensor",
        "config": [
            {
                "property": "name",
                "value": "Hearth CO"
            },
            {
                "property": "device_class",
                "value": "gas"
            },
            {
                "property": "icon",
                "value": ""
            },
            {
                "property": "unit_of_measurement",
                "value": "ppm"
            }
        ],
        "state": "payload > 5",
        "stateType": "jsonata",
        "attributes": [],
        "resend": true,
        "outputLocation": "",
        "outputLocationType": "none",
        "inputOverride": "allow",
        "x": 530,
        "y": 200,
        "wires": [
            []
        ]
    },
    {
        "id": "90c2a508.6d0168",
        "type": "serial-port",
        "z": "",
        "serialport": "/dev/serial/by-id/usb-1a86_USB_Serial-if00-port0",
        "serialbaud": "9600",
        "databits": "8",
        "parity": "none",
        "stopbits": "1",
        "waitfor": "",
        "dtr": "none",
        "rts": "none",
        "cts": "none",
        "dsr": "none",
        "newline": "\\n",
        "bin": "false",
        "out": "char",
        "addchar": "",
        "responsetimeout": "10000"
    },
    {
        "id": "d9aa779f.afb208",
        "type": "server",
        "z": "",
        "name": "Cabin",
        "legacy": false,
        "addon": false,
        "rejectUnauthorizedCerts": true,
        "ha_boolean": "y|yes|true|on|home|open",
        "connectionDelay": true,
        "cacheJson": true
    }
]
Home Assistant Integration + Safety Alarms
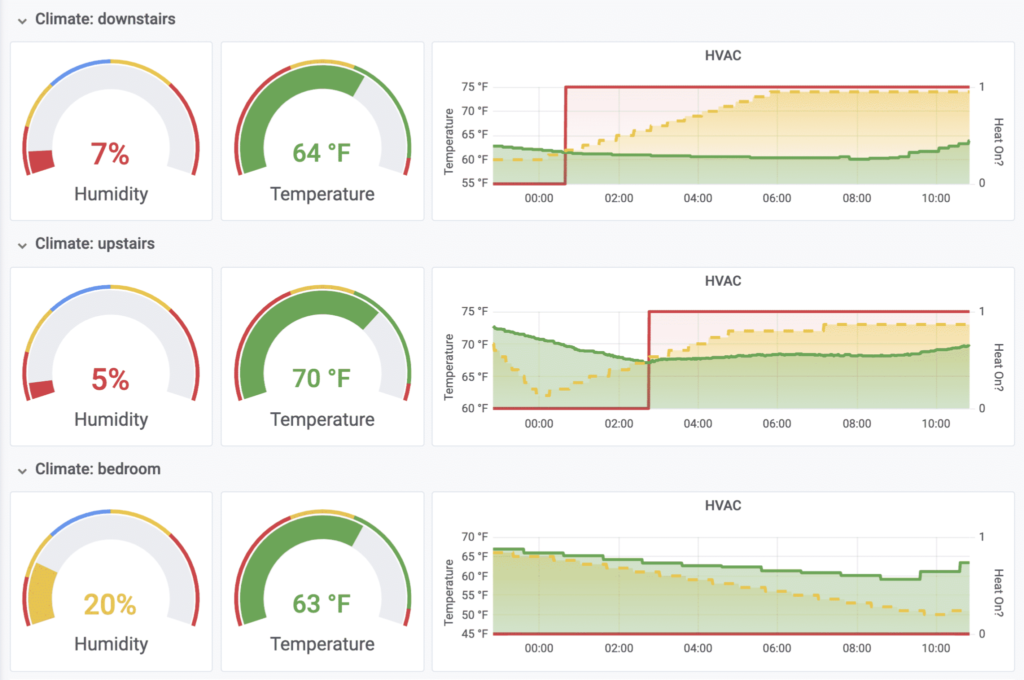
Now the Raspberry Pi sensors’ data should show up in Home Assistant under the sensor names provided by Node RED. With Grafana and Prometheus integrations, it’s not too hard to build graphs like these:

These sensors are the foundation of a home security system that will ultimately replace expensive products (like Nest Protect) in the cabin. It other posts on Observability, I explain how to use Grafana and Prometheus to create alerts when “something bad happens.”


