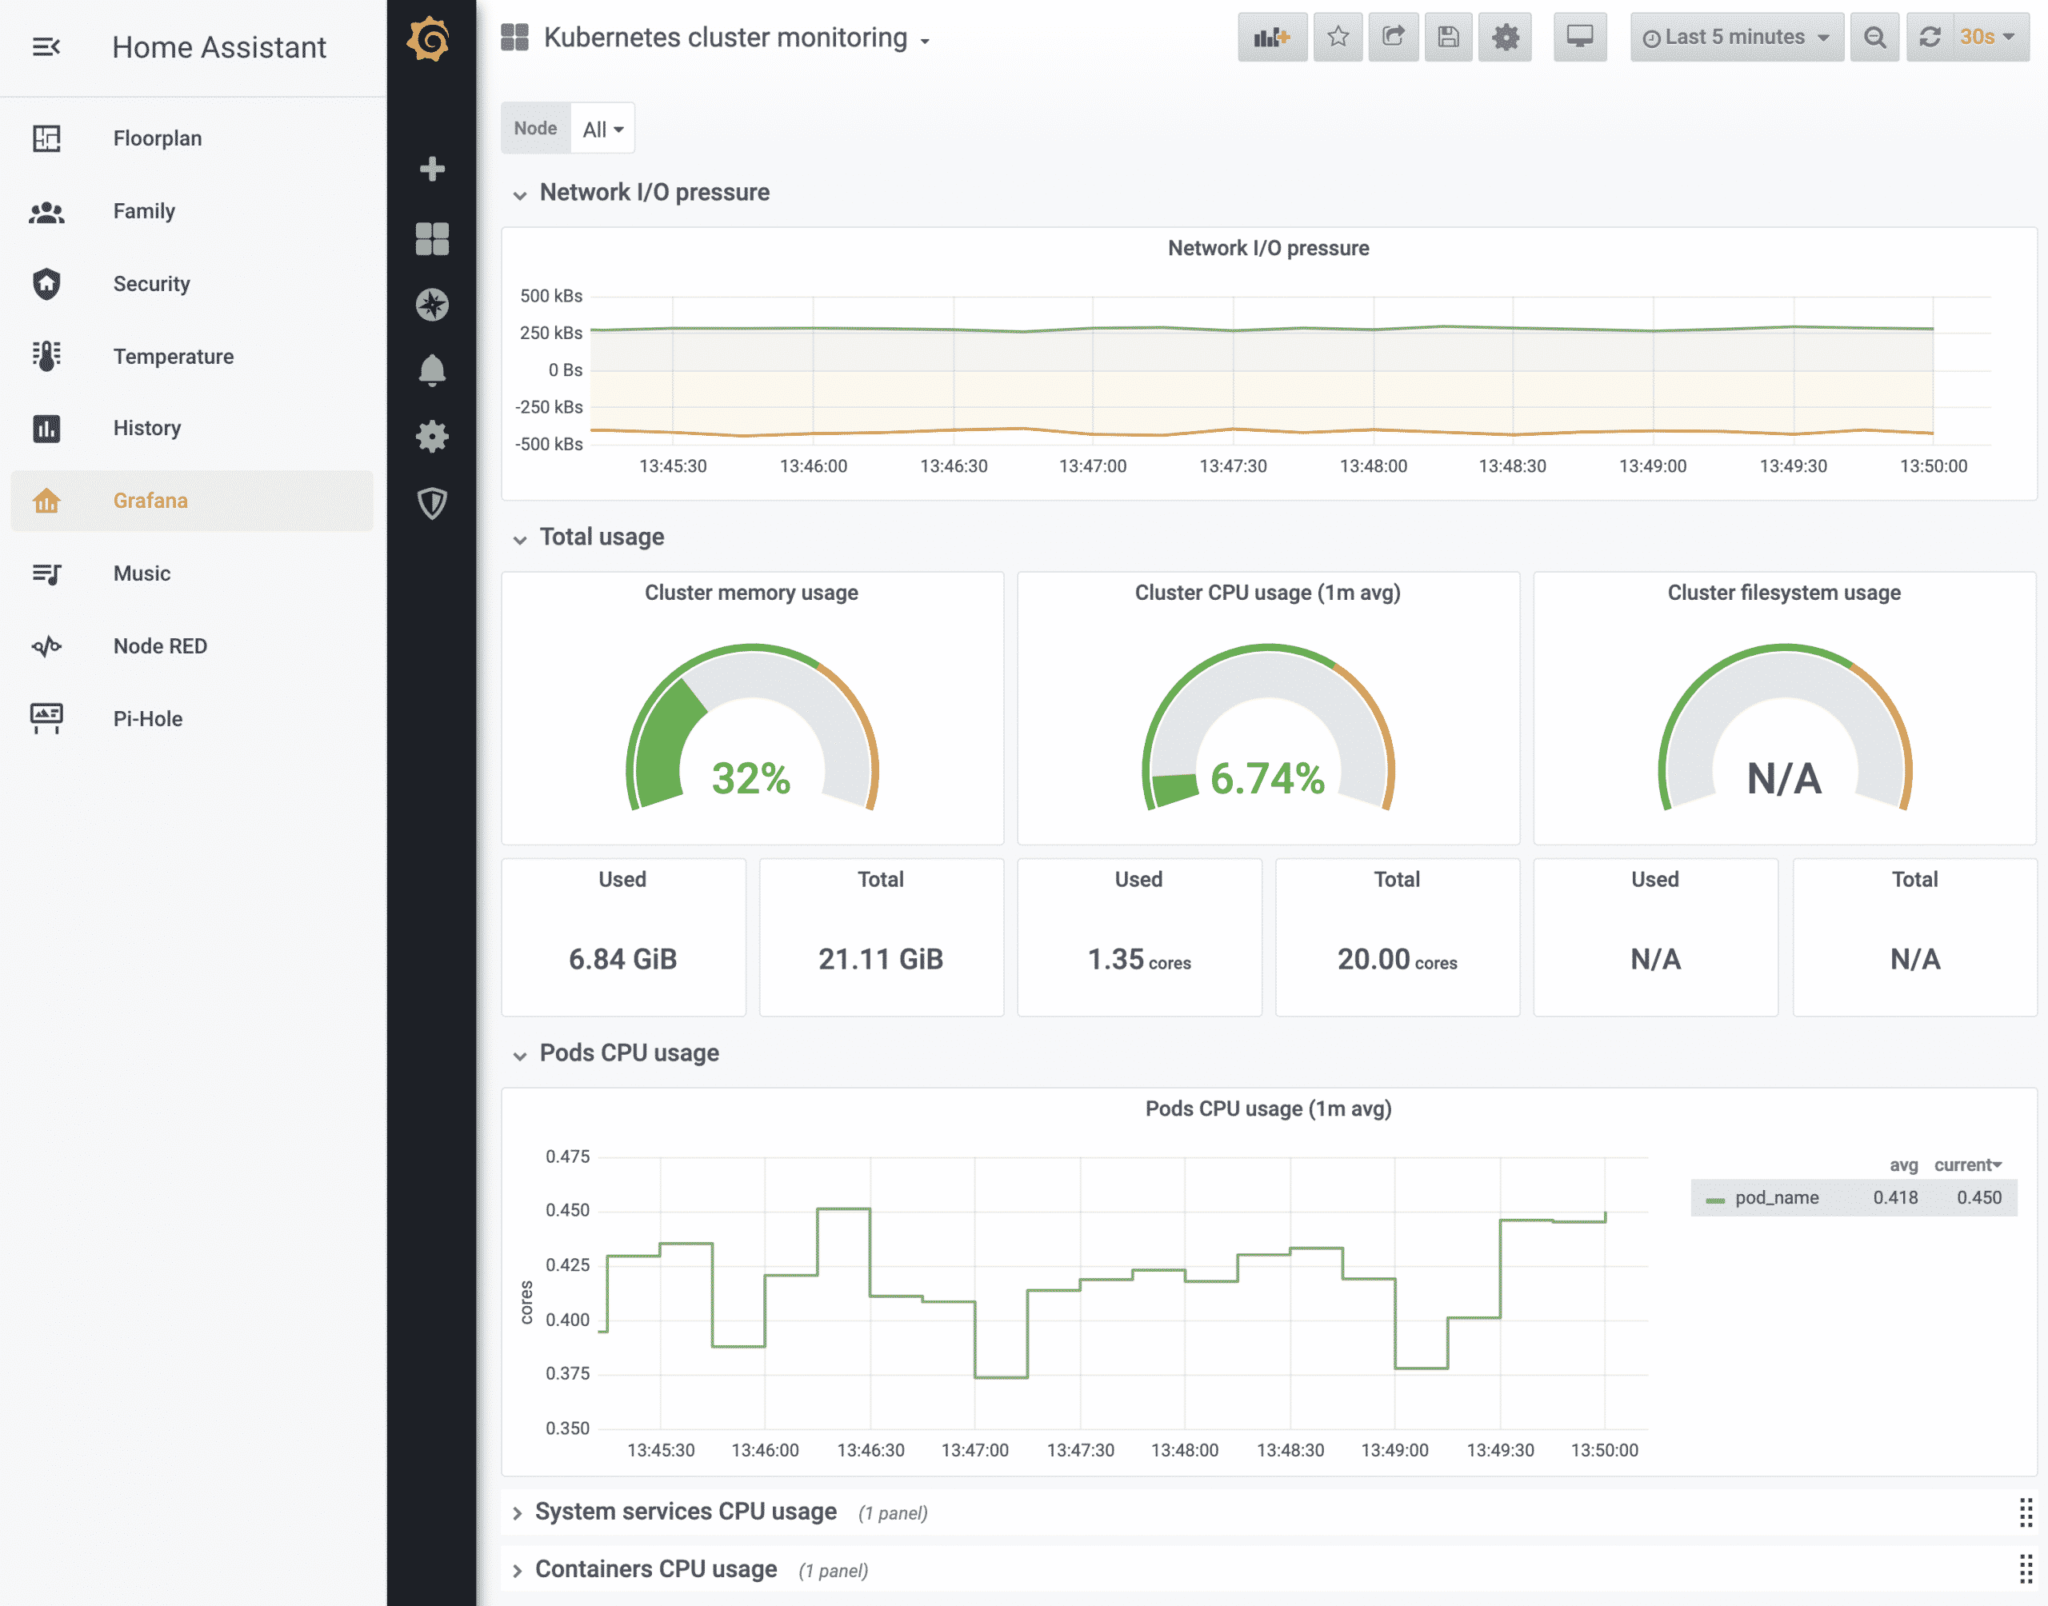
On the left side of Home Assistant are a number of different panels. Most users are familiar with the default panels, like “Overview,” a.k.a. the Lovelace dashboard — but it’s possible to do a lot more with home assistant custom panels.
For a breakdown of each panel in the screenshot above, see the log cabin -> smart home retrofit.
Multiple Lovelace Dashboards
As of version 1.0.7, Home Assistant supports creating more than one Lovelace dashboard, configurable at /config/lovelace/dashboards. Each panel is essentially an entirely new, stand-alone dashboard.
I like using panels more than tabs because I find it significantly easier to navigate. In the image above, you can see how Security, Temperature, etc. are broken out into separate panels. Hopefully, we’ll soon be able to re-order the panels as well.
Taking it a step further, it’s possible to add iframes as panels. This is useful for embedding other services on the network, like the Iris/Mopidy music player seen in the screenshot above.
[Example] Simple IFrame
The simplest possible example of a custom panel is a single file residing at panels/custom-iframe.html. This custom iframe panel does not render a top bar, and ensures that the iframe fills the entire viewport without overflowing. In short, it makes the embedded webpage take up the entire right half of the screen.
<dom-module id='custom-iframe'>
  <template>
    <style include="ha-style">
        iframe {
          overflow: hidden;
          position: absolute;
          left: 0;
          right: 0;
          top: 0;
          bottom: 0;
          border: 0;
          width: 100%;
          height: calc(100%);
          background-color: var(--primary-background-color);
        }
      </style>
      <iframe
        src="[[panel.config.url]]"
        sandbox="allow-forms allow-popups allow-pointer-lock allow-same-origin allow-scripts"
        allowfullscreen="true"
        webkitallowfullscreen="true"
        mozallowfullscreen="true"
      ></iframe>
  </template>
</dom-module>

<script>
Polymer({
  is: 'custom-iframe',
  properties: {
    hass: {
      type: Object,
    },
    panel: {
      type: Object,
    }
  },
});
</script>
How it Works
To use the above custom IFrame panel, add the following to configuration.yaml:
panel_custom:
  - name: custom-iframe
    sidebar_title: "Custom Iframe"
    url_path: my-custom-iframe
    config:
      url: "http://my-test-site.com"
Replace the URL with the site you wish to view. By default, Home Assistant will infer from the name to load panels/custom-iframe.html (from the last section). If you wish to reuse the panel code, you can explicitly declare the location of the html file with webcomponent_path: "panels/iris.html".
However, the preferred way to build modern custom panels is to use a module.
[Example] Using a Module
Instead of the webcomponent_path (or no path at all), the preferred way to create a custom panel is to use a module. Here is a boilerplate HTMLElement (which could reside at www/custom-panel-example.js):
class CustomPanelExample extends HTMLElement {
  constructor () {
    super()
    this._shadow = this.attachShadow( { mode: 'open' } )
  }

  render() {
    // Sample of changing the HTML contents of the panel.
    this._shadow.innerHTML = '<div>' + JSON.stringify(this._config) + '</div>';
  }

  set panel(panel) {
    // Called once with the exact contents from the YAML definition
    console.log('custom panel config', panel.config);
    this._config = panel.config;
    this.render();
  }

  set hass(hass) {
    // This function is called frequently, containing the HA state.
    console.log('entity states', hass.states);
  }
}

customElements.define('custom-panel-example', CustomPanelExample);
Which could then be used with the following configuration:
panel_custom:
  - name: custom-panel-example.js
    module_url: "/local/custom-panel-example.js"
    sidebar_title: 'Example'
    url_path: example
    config:
      hello: 'world!'
If all goes well, the panel should show {"hello": "world!"}.
[Example] Reusable Full-Screen iFrame Module
This example shows how to create a single module that may be used multiple times. This allows you have just one module file, but create as many custom panels as you need. Each panel will be a full-screen iframe. First, create www/iframe-fullscreen.js:
class IframeFullscreen extends HTMLElement {
  constructor () {
    super()
    this._shadow = this.attachShadow( { mode: 'open' } )
  }
  render() {
    this._shadow.innerHTML = `<style include="ha-style">
        iframe {
          border: 0;
          width: 100%;
          height: calc(100%);
          background-color: var(--primary-background-color);
        }
      </style>
      <iframe
        src="`+this._config.url+`"
        sandbox="allow-forms allow-popups allow-pointer-lock allow-same-origin allow-scripts"
        allowfullscreen="true"
        webkitallowfullscreen="true"
        mozallowfullscreen="true"
      ></iframe>`;
  }
  set panel(panel) {
    this._config = panel.config;
    this.render();
  }

}
customElements.define('iframe-fullscreen', IframeFullscreen);
Then add the configuration:
panel_custom:
  - name: iframe-fullscreen
    module_url: "/local/iframe-fullscreen.js"
    sidebar_title: 'iframe1'
    url_path: iframe1
    config:
      url: "https://node-workshop.snowy-cabin.com/"

  - name: iframe-fullscreen
    module_url: "/local/iframe-fullscreen.js"
    sidebar_title: 'iframe2'
    url_path: iframe2
    config:
      url: "https://node-doorbell.snowy-cabin.com/"
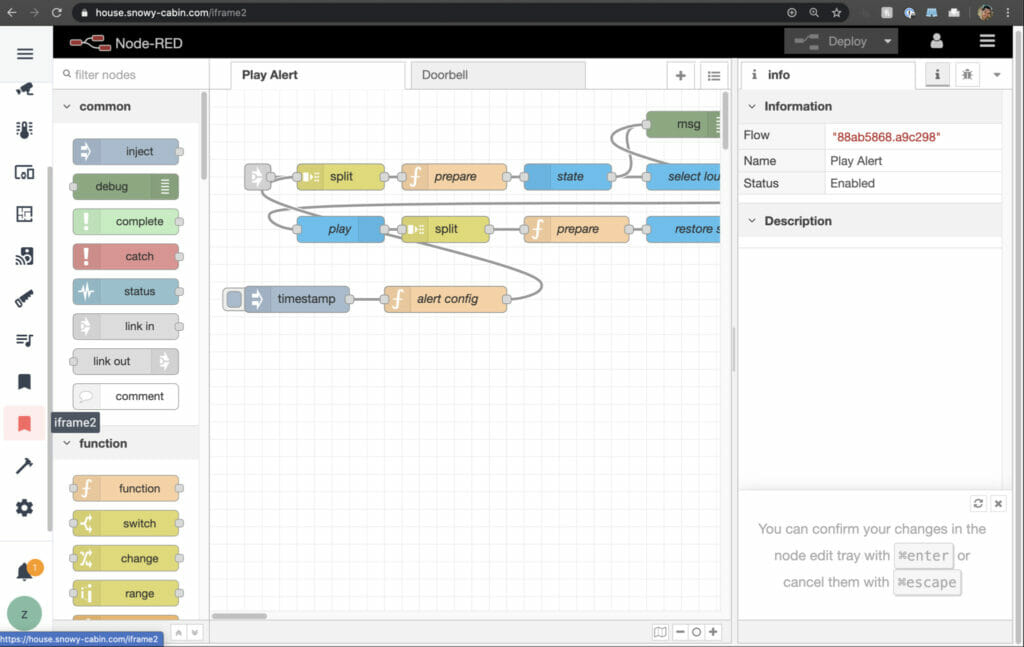
Notice how each of the panels have the same name, which matches the custom element definition in the module. In other words, the name field is used for the name of the component to load (and does not need to be unique). In this screenshot, you can see how this lets me load a tab for two different Node-RED instances:

[Example] Replacing History with Grafana
I like using Grafana much more than the built-in History features because I pipe all of my various metrics through Prometheus. It’s a much more feature-rich graphing application than the built-in History. One simple example: it’s easy to change the time range with Grafana.
It also means I can use a single visualization tool to graph much more than just Home Assistant data. Home Assistant’s Prometheus integration is not spectacular, but it is enough to get the data into Grafana and shut off the default “History” feature.
Looking for help bulidng Grafana charts for Home Assistant to fully replace the History card?
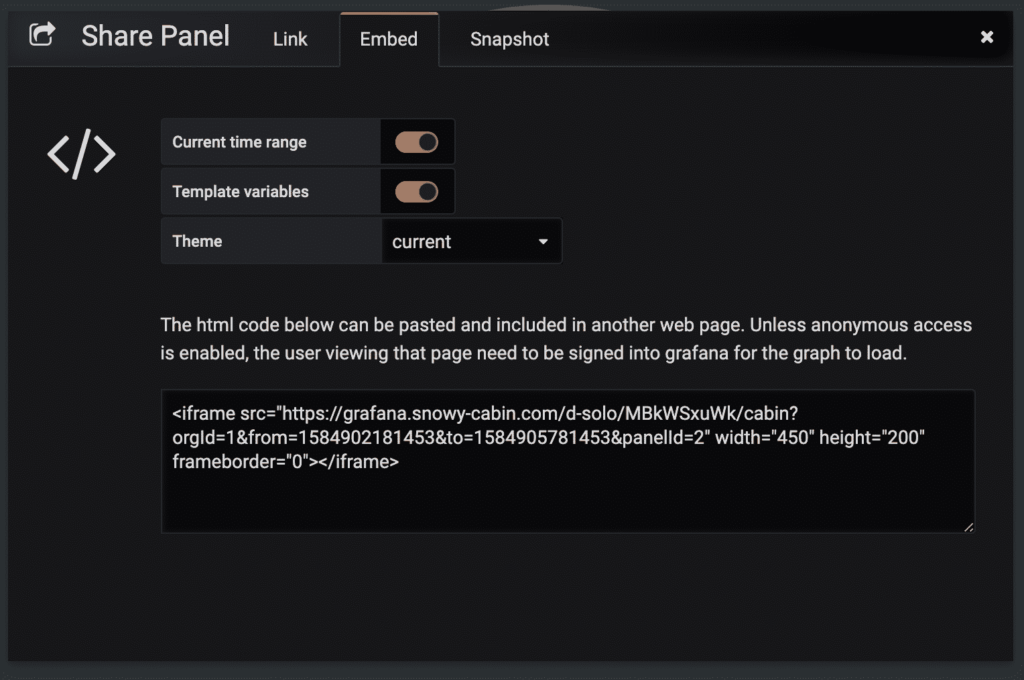
One way to achieve this is to click on any panel in Grafana and choose “share,” and then use that URL in a lovelace iframe card:

However, this is very inflexible. Multiple iframes must be loaded (one for each panel). The panels need to be manually configured, one by one, in lovelace. Instead, it can be convenient to have access to an entire Grafana dashboard.
With the custom iframe panel from the last section created, a custom panel can be added to configuration.yaml:
panel_custom:
  - name: custom-iframe
    sidebar_title: Grafana
    sidebar_icon: mdi:home-analytics
    url_path: grafana
    require_admin: true
    config:
      url: !secret grafana_dashboard
The grafana_dashboard URL can simply be a URL to any dashboard. You can also set the query parameter &kiosk to remove the chrome from Grafana. More tips on running Grafana in Docker/Kubernetes are available if you get stuck.

To remove the default panels (Map, Logbook, and History) from Home Assisstant, first remove the default_config entry from configuration.yaml and then re-add each of the components which it loads (except for those you wish to exclude, of course).


I am still not really sure how to have a custom iframe panel with no top bar and be reusable. Even your simple first example doesnt show up after restarting hass. Is there a solution to having a reusable template that allows me to create multiple sidebar entries for iframes with no top bar? Your second example doesnt really have anything to do with iframes from what i can see.
I edited the post and added a new section called “Reusable Full-Screen Iframe Module.” I just took the screenshot of it working a few minutes ago on HA version 0.110.2, testing with the exact code pasted.
It’s suspicious that the first example doesn’t work. I just tested it by copy-and-pasting both code blocks. Maybe check your Logs tab to see if something went wrong? Note that the panel’s HTML filename needs to match the component name registered within the file. In other words, please double-check that the dom-module ID from the first line of the HTML file matches the name of the HTML file and also the
panel_custom.namefrom the YAML.Hope it helps!
Thanks. I had actually partly resolved your simple example before you replied, but I appreciate the repeatable solution. I think a majority of my issues now are cors/https related. “Fun” trying to get multiple apps working internally and externally too while not opening port 80/443 as well. Thanks again for that new solution.
Glad you got it sorted out! Ugh, yah, CORS & HTTPS can be a pain. IME, trying to run HTTPS without port 443 is not worth it. I expose port 443 on my home network, and all ingress on that port is handled by Switchboard (Envoy). I feel pretty secure with this approach. FWIW, it’s all documented in the home server and home networking section, including how I do DNS resolution internally and externally, HTTPS certificates, etc.
hi
nice post. What I wanted to ask, perhaps you know how to do this: I want to use a button w/ action: url and url_path, to call an URL in the background, w/o opening a new tab. For example, I have some ESP8266s that I programmed and those provide a webgui to toggle/turn on/turn off a relais. If I call `http://192.168.178.102/?ajaxLoad(%27TOGGLE%27)` the relais will toggle. The button I want to add should just call that URL in the background, w/o opening a new tab, and that will toggle the relais on the ESP8266. Another use would be to open the camera live stream in VLC player, using action: url url_path: ‘rtsp://192.168.178.51:8554/unicast’. This also opens another tab in the browser with about:blank, which is annoying..
thanks
Thanks.
Sounds like you’re looking for the HA RESTful command.
That said, I would consider using a more standard IOT protocol for your interactions, such as MQTT or Web Sockets. HTTP commands, such as you’ve implemented, are not really a great choice due to their slowness, lack of security, etc.
Hello, when copying your grafana example I get this error: Unable to register panel Grafana: Either js_url, module_url or html_url is required.
When I add my grafana URL as html_url, either below config: or below panel_custom: it also doesnt work. Have there been some breaking changes on this?
I’m still using this code. In my experience, the error you described appears when you have not set up the appropriate source file, as described earlier in the post, for `custom-iframe.html`. If HA cannot find the necessary implicit filenames (see the section of the post: “How it Works”), it looks for explicit definitions and then throws this error.